


Travel memories often come with small keepsakes — tickets, photos, and coins from different countries. With a simple resin project, you can transform those tiny souvenirs into beautiful handmade coasters that remind you of your favorite trips.
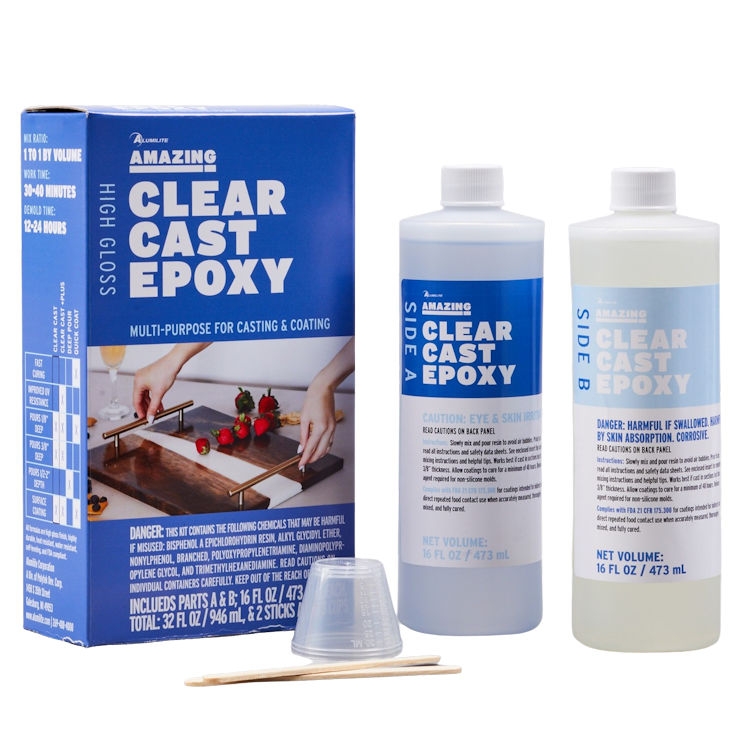
For this project we use Amazing Clear Cast Plus Epoxy Kit by Alumilite, a crystal-clear two-part epoxy resin that mixes easily in a 1:1 ratio. It is known for its high clarity and glass-like glossy finish, making it perfect for projects where you want to encapsulate objects and highlight their details. The formula is designed to provide reliable, consistent results, which makes it suitable for both beginners and experienced resin artists.
Below is an easy step-by-step DIY tutorial to create resin coasters with coins from a favorite trip.
What you will need
- Amazing Clear Cast Plus Epoxy Kit 32oz
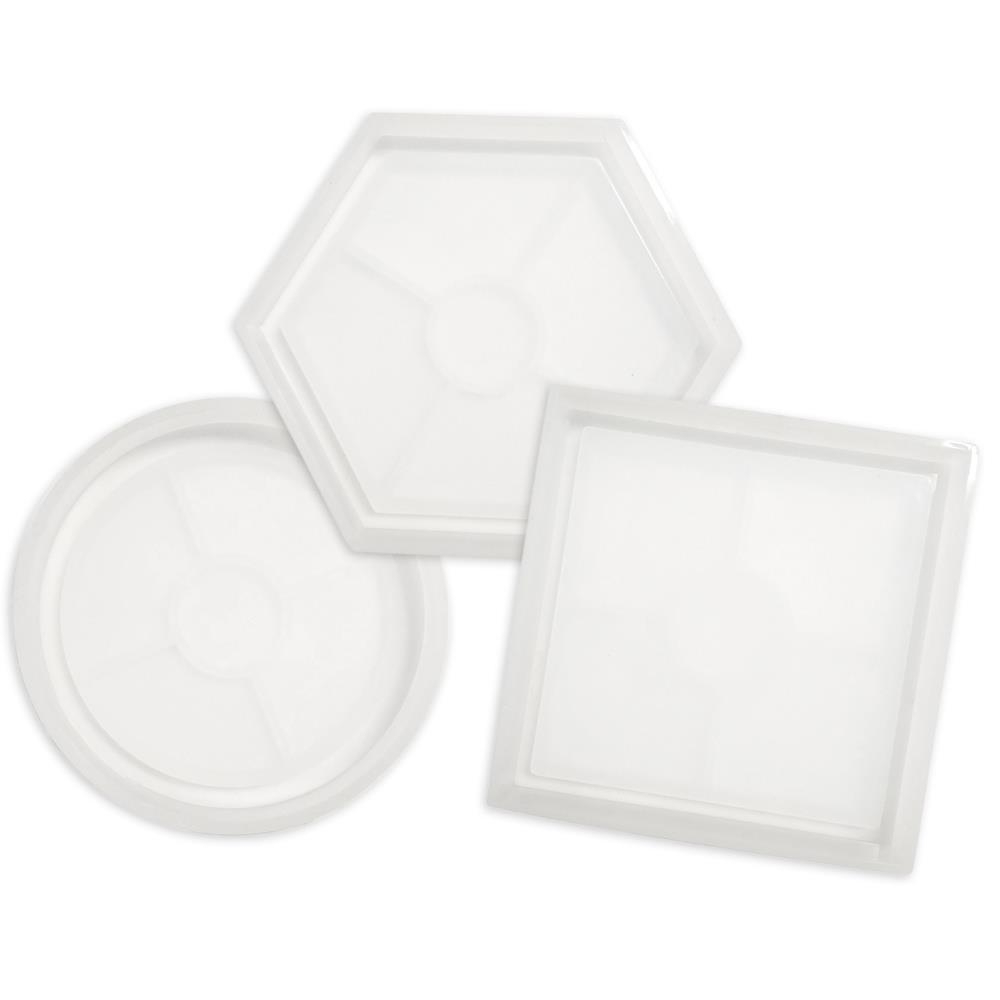
- Silicone coaster mold
- Coins from a trip or favorite destination
- Mixing cups (included in the kit)
- Stir sticks ( " )
- Disposable gloves ( " )
- Toothpick or tweezers
- Optional: glitter, flakes, or pigments
- Optional: heat gun or small torch for bubbles
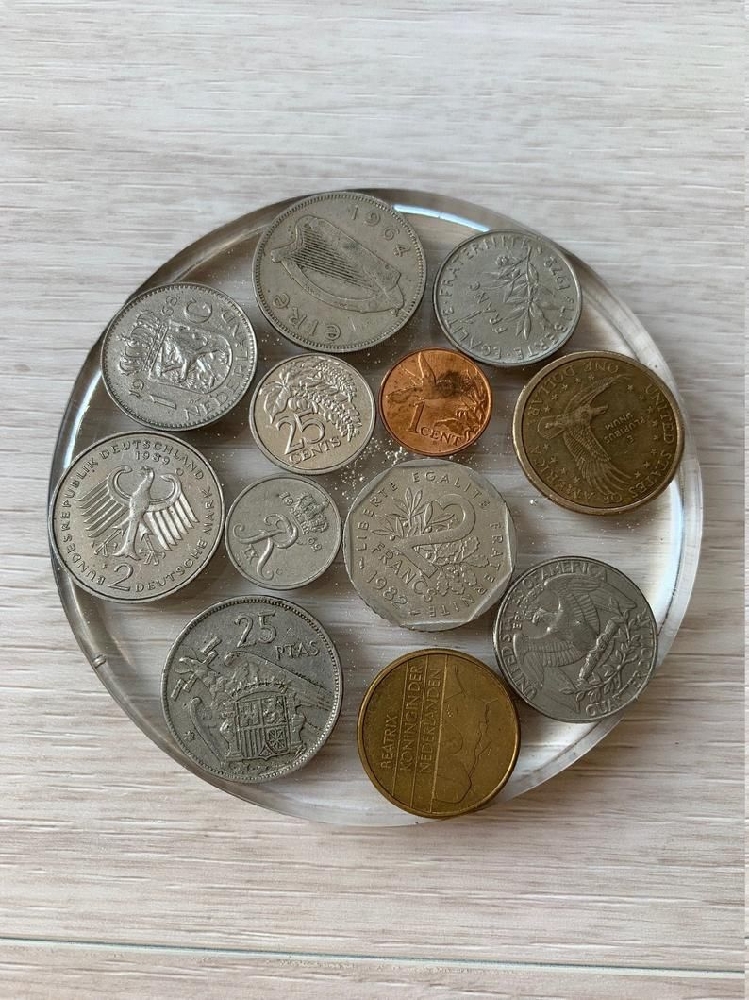
Step 1: Choose your coins
Select coins from a memorable trip, city, or country. You can place one larger coin in the center or create a composition with several smaller ones.
Step 2: Prepare your mold
Place the silicone mold on a completely level surface. This ensures that the resin cures evenly and your coaster keeps its proper shape.
Step 3: Test the layout
Before mixing the resin, place the coins inside the mold to see how they will look in the final piece. This allows you to adjust the arrangement and decide on the best design.
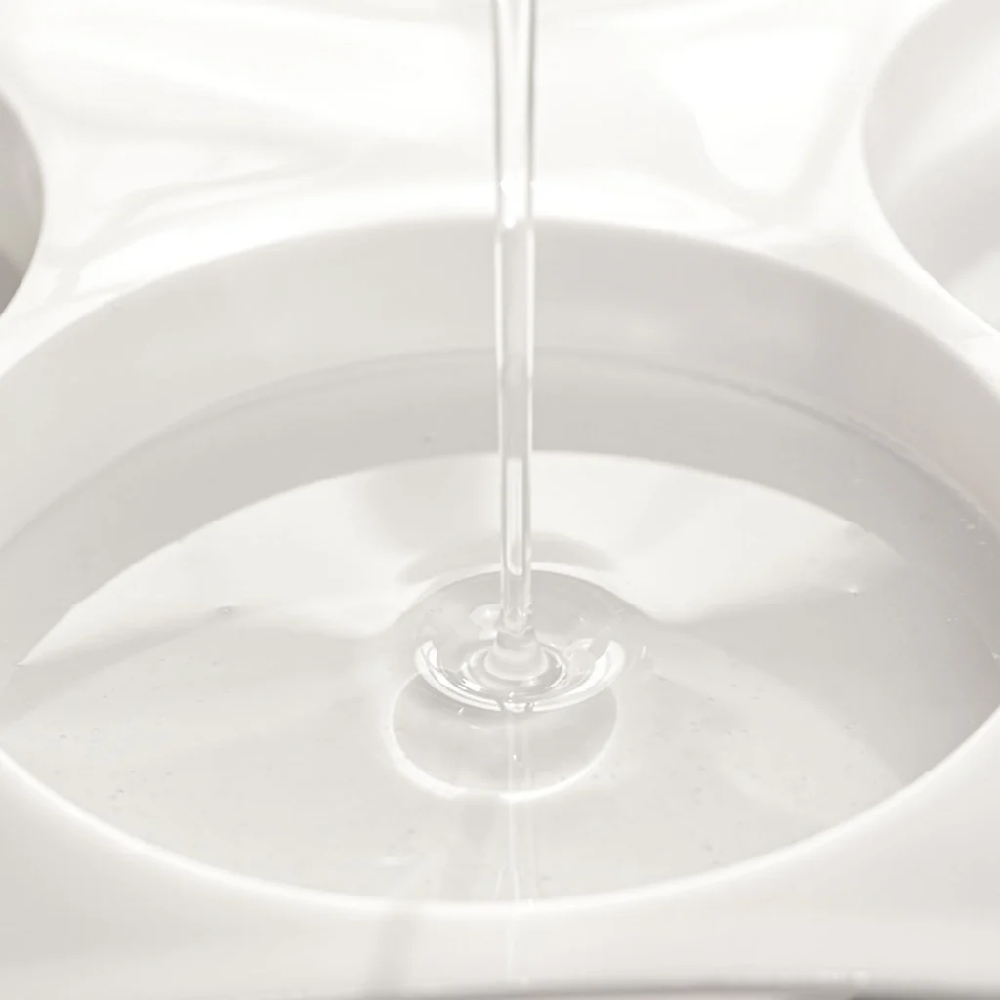
Step 4: Mix the resin
Mix Part A and Part B in a 1:1 ratio by volume, following the product instructions. Stir slowly and steadily for a few minutes until the mixture becomes fully combined and clear.
Step 5: Pour the base layer
Pour a thin layer of resin into the bottom of the mold. This layer acts as a base that will help hold the coins in place.
If you see bubbles, gently pass a heat gun or small torch over the surface to remove them.
Step 6: Place the coins
Using tweezers or your hands, carefully place the coins on top of the resin layer. Press them lightly so they sit flat and stay in position.
At this stage you can also add decorative elements such as a touch of glitter or metallic flakes if desired.
Step 7: Add the second layer
Slowly pour more resin until the coins are completely covered. Avoid overfilling the mold.
If small bubbles appear around the coins, use a toothpick to gently move them toward the surface.
Step 8: Remove bubbles
Lightly pass a heat gun over the surface again for a few seconds to eliminate remaining bubbles and achieve a smoother finish.
Step 9: Let the resin cure
Leave the mold in a dust-free area and avoid moving it while the resin cures. Typically, the resin will fully harden in 24–48 hours, depending on temperature and thickness.
and last step: Demold your coaster
Once the resin has completely cured, carefully remove the coaster from the silicone mold. You’ll have a clear, glossy coaster that preserves a small piece of your travel memories.
With just a few materials and a bit of creativity, you can transform simple travel coins into beautiful and meaningful resin coasters that combine memories with everyday use.


