


Pouring, also known as "fluid painting," is one of the most impressive techniques. It involves a creative process where paints are poured onto the canvas, allowing them to flow and blend together in a unique and unpredictable way. Each result is different, full of movement and vibrancy.
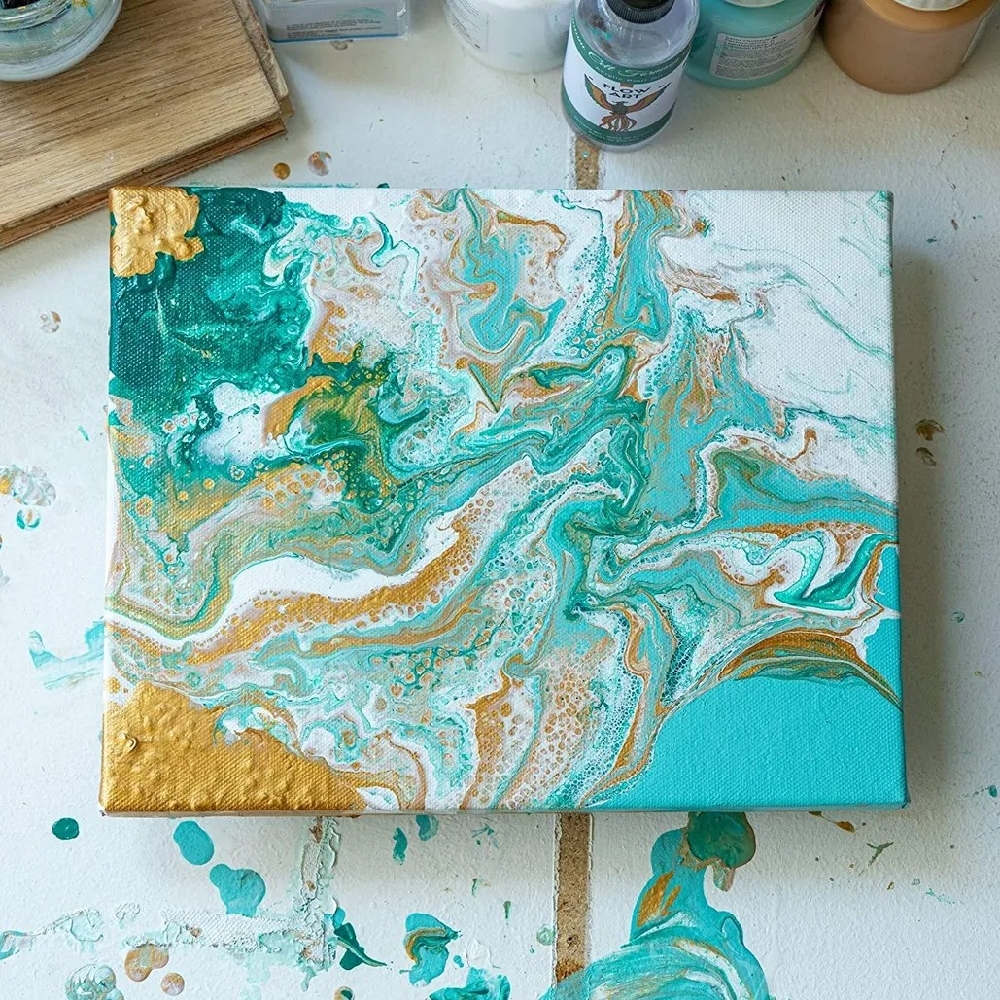
Unlike traditional brush painting, pouring uses liquid acrylic paint, which is often mixed with pouring medium to achieve the right fluidity. The technique relies on gravity, flow, and the interaction of colors, creating unpredictable yet mesmerizing patterns.
Today, I will guide you step by step to create your very first pouring art piece!
Materials needed
Before you start, gather the basic materials:
Acrylic paints(in various shades)
Pouring medium (to thin the paints properly without losing their intensity)
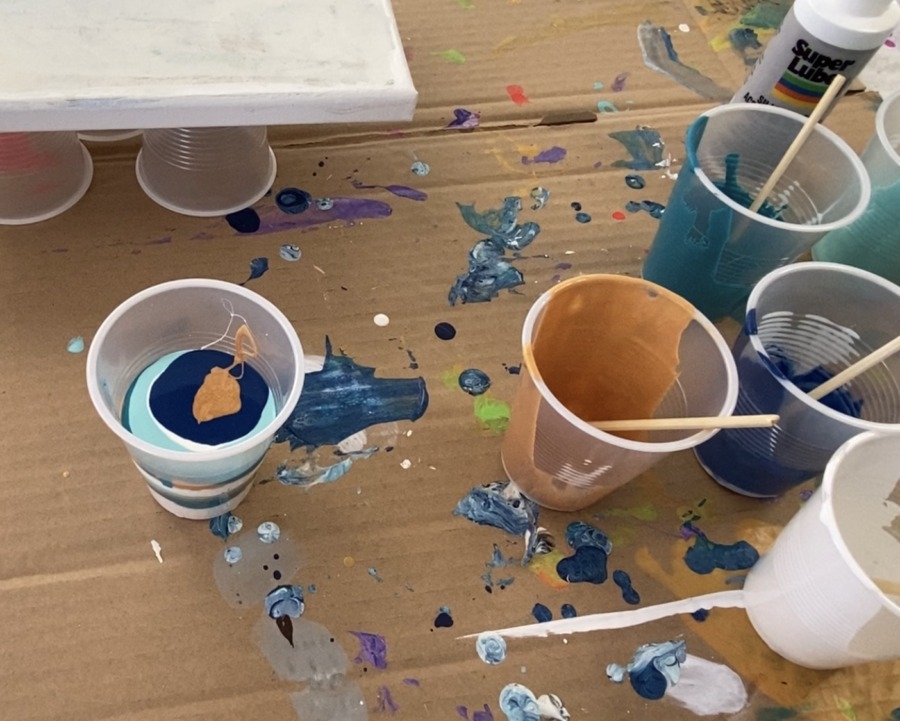
Plastic cups for mixing
Stir wooden sticks or small spoons for stirring
Gloves and protective surface/paper for your workspace
Hot air gun or torch (optional, to create "cells")
Preparation
- Cover your work surface with a protective cover.
- Place your canvas on top of cups or supports so that the paint can flow freely and doesn’t stick to the bottom.
- Put on gloves – pouring can be messy, but it's also fun!
Step 1: Mixing the colors
- In each cup, pour your acrylic paint or create a mixture of colors you like – start with white and add 3-4 other colors, without mixing them together!
- Add pouring medium (about a 1:1 ratio with the paint) and stir well until the consistency is like thick honey.
- If you want, add a few drops of water for an even more fluid texture.
Tip: Do a test with a stir stick – the paint should drip smoothly, not in clumps.
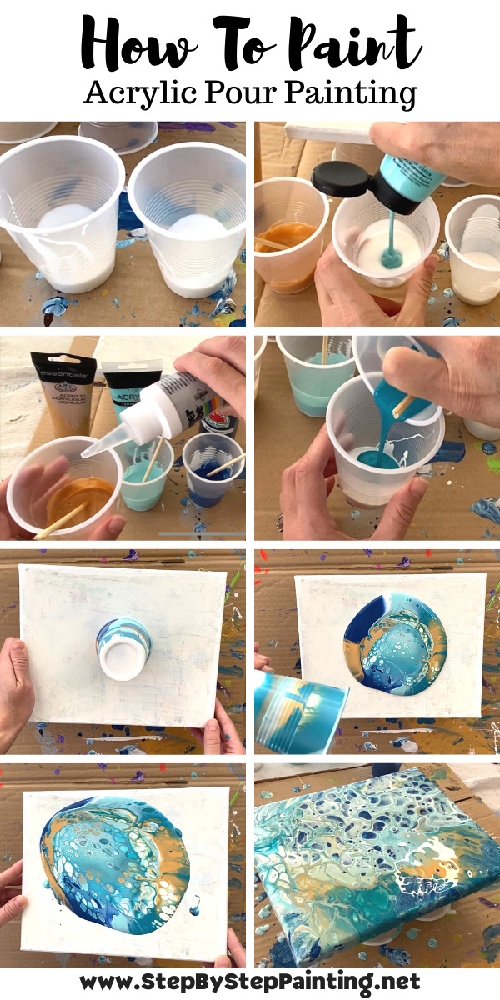
Step 2: "Pour" Creation
There are several techniques:
Dirty Pour: Add all the colors in your cup, without mixing them lot, and then drop the cup on the canvas.
Flip Cup: Fill a cup with colors, place it upside down on the canvas and lift it.
Puddle Pour: Add color in the center and then continue by pouring the rest of the colors on top.
Swipe: Pour the colors onto the canvas and then use a spatula or paper to push and spread them, creating interesting effects.
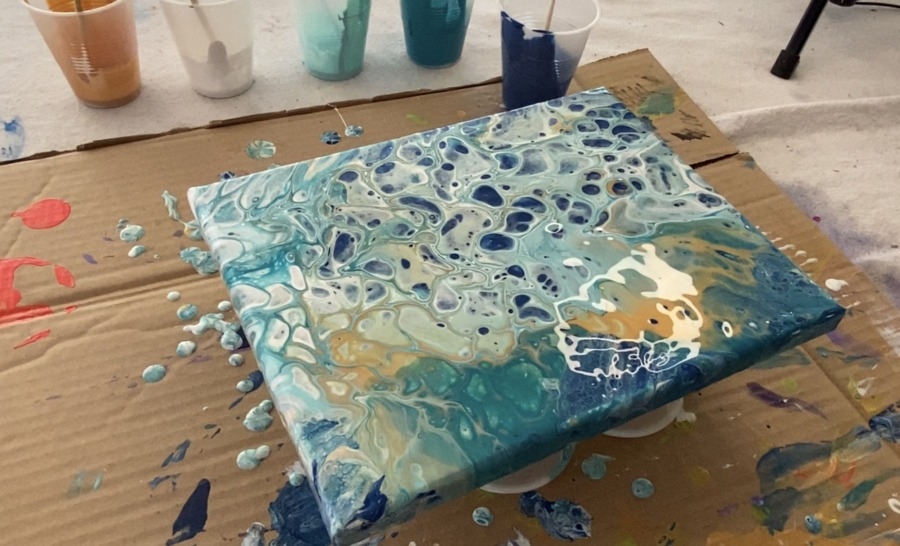
Step 3: Spread and Work the Paint
Tilt the canvas gently to let the colors flow and cover the surface. Watch how they blend and form unique patterns.
Tip: Use a heat gun or torch to pop bubbles and create cells.
Step 4: Drying
Leave the canvas on a horizontal surface to dry naturally. It usually takes 24-48 hours to dry completely.
Final Touch
Since it dries, add a varnish or resin to achieve a protective glossy finish.
And that's it! Your project is pure magic!
And the best part is that pouring is a technique where there is no wrong or right - each outcome is unique!
Gather your supplies from scrapsnpieces and welcome to the magical world of pouring art.
See you next week!
Artistic kisses.
this article is adapted from the original article How to do Acrylic Pouring


