


If you've just purchased your first Gel Printing Plate and want to learn how to use it, or if you've already created countless prints and are seeking inspiration and new ideas for your projects, this post is for you!
Monoprinting using Gel printing, allows you to make striking prints by applying acrylic paints onto the unique surface called a Gel Plate. It’s a fantastic way to express your creativity and explore endless possibilities with paper and other materials.
In this blog post, we’ll dive into the exciting world of Gelli printing—from the basics you need to know to some inspiring ideas to help you experiment and grow your skills.
Grab your Gel Plate, acrylics and a piece of paper and let's start!
Monoprinting with Gelli: the basics
Monoprinting with a Gel Printing Plate is the process of creating unique, one-of-a-kind prints—known as monoprints—using acrylic paints and a special surface/tool called a gel plate. The gel printing plate, also known as a Gelli plate, is a soft and sticky surface made from a polymer material. It has replaced the traditional glass or acrylic surfaces and presses that were used in the past for this technique. With a gel printing plate, you can produce beautiful prints without the need for actaully using a press.
Essentials to get started.
A Gel Printing Plate: Choose a gel plate of high quality. The most popular options are those from Gelli Arts. They are high-quality and come in various sizes. Despite the higher cost, these surfaces are truly durable and long-lasting! Always store them in the original case in which you purchased them, away from heat, sunlight, or any UV sources, or the Ranger metallic storage tin for maximum protection. Lastly, do not discard the anti-scratch covers that come with the plates. Remove them only when you are ready to use the plates.
Acrylics or Stazon Inks: Choose a Variety of Acrylic Paints or Inks in Your Favorite Shades: Acrylic paints are easily available, affordable, and provide vibrant colors suitable for Gelli printing. DecoArt Premium, Dylusions and Americana are excellent options. You can slow down their drying time by adding a retarder like acrylic glaze or a gel medium. Alternatively, Stazon Inks offer smoother textures and faster drying times, making them ideal for creating multiple layers without smudging.
Brayer: A brayer is used to spread the paint evenly across the surface. Choose a soft rubber roller that glides smoothly over the surface without leaving streaks or marks.
Paper or Fabric: Select paper or fabric for printing your designs. The quality of the printing substrate is very important. Never use photographic paper or papers with coatings. Based on my experience, Bristol paper is ideal for Gelli printing. Some people also use tissue paper or thicker papers like watercolor paper. I recommend experimenting to see what works best for you. Additionally, you can print on fabric.
Stencils, Embossing Folders, and Other Inspiration: Enhance your Gelli prints by incorporating stencils, embossing folders, and other tools. These add depth, dimension, and an extra touch to your creations, allowing you to experiment with various patterns and themes.
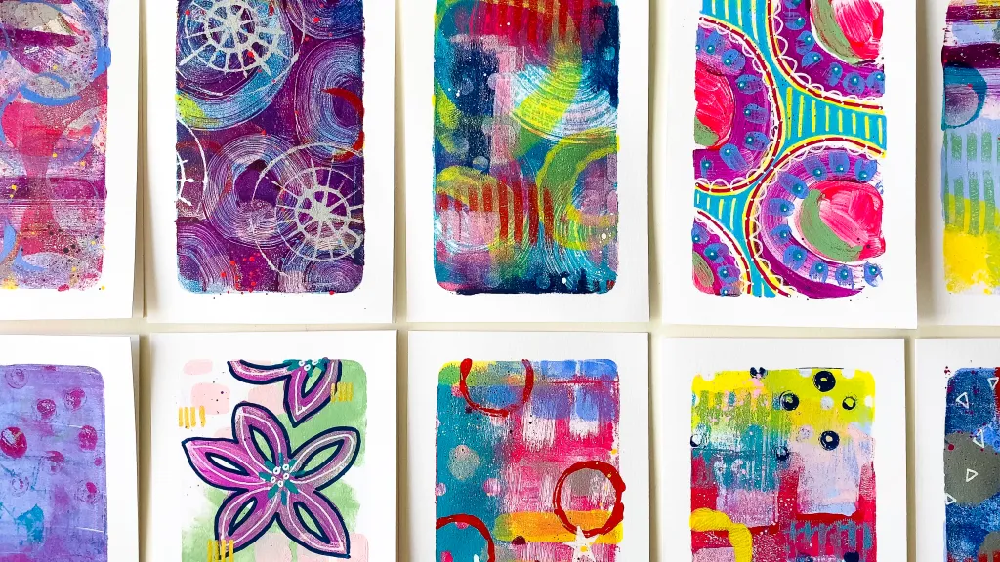
What can you create with the monoprinting technique?
Using the Gelli Plate opens up a world of endless possibilities! The most common use is for creating pages in your art journal. However, you can also make prints on fabric, such as denim, on jewelry, wood, stone, and much more! Once you learn how to create with Gelli plates, you can design on almost any material!
-Copy-2.png)
How to Create Prints with Gelli
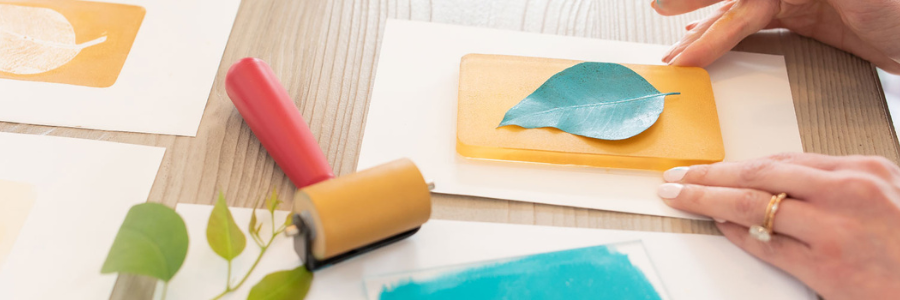
Apply acrylic paint to the Gel Printing Plate - The first step is to place a few drops of your desired colors onto the surface.
Use a brayer to spread the paint - Next, evenly spread a thin layer of paint across the gel plate using a brayer. You can also use a brush or other texture tool to create different patterns—even your fingers. Make swirls, lines, or abstract shapes by dragging, blending, or scraping the paint on the surface.
Be careful not to scratch the plate, as scratches will show up in all your prints. Use silicone tools, palette knives, and rubber brayers. Never use sharp or metallic tools on your plate.
Add various effects using other objects - Use stencil, embossing folders or other items to add textures and interesting details on your prints
Print your design - Place a sheet of paper, fabric, or any material you want to print onto the gel plate and press gently with even pressure. Remove the paper to reveal your print.
If you like the design, feel free to use a second or third sheet as long as there is still paint on the gel plate.
This is the magic of Gelli printing—endless creativity and limitless possibilities! Don’t hesitate to experiment with different materials, techniques, and patterns to create unique works of art. From printing on paper and fabric to integrating design elements like stencils and textures, the options are countless!
-Copy-2.png)
Now that you've seen how simple and fun it is, I encourage you to try out some of the ideas below! Gelli printing is highly addictive!
- Gel Printing with leaves by Hop Along Studio - use leaves to add texture to your crafts.
- Using pasta by A Colorful Journey - so many ways to add texture to your crafts, would you actually think of using pasta?
- Create layers with your Gel Plate and Kim Dellow - an amazing you tube tutorial.
- Gel Printing and watercolor by Marsha Valk - a different approach
- Add stamps on your prints by Susanne Rose
Now let's see how we can creatively apply all these ideas! There are countless fantastic tutorials to guide you in using gel printing. From wall art and decorative objects to clothing and personal accessories, gel printing has a wide range of applications. The possibilities are endless!
I suggest some of the most creative and exciting ones I've found online!
-Copy-2.png)
1. Earrings by Vicky Meyers
2. Beauty case made from Kraft-Tex by Marsha Valk
3. Gel Printing on fabric by Marsha Valk
-Copy-1.png)
1. Tissue paper, Gel Printing and candle decoration by Marsha Valk
2. Gel Printing on denim fabric by Giovanna Zara
3. Bowl made from papier mache and gel printing by Mollie Weston
-Copy-1.png)
1. Gel Printing and Decoupage on a frame by Vicky Meyers
2. Gel Printing and Decoupage on a coaster
3. Transform your bracelets by Vicky Meyers
-Copy-1.png)
1. Gel Printing on Fabric Fusable Interfacing by Birgit Koopsen
2. Transform your canvas shoes by Carolyn Dube
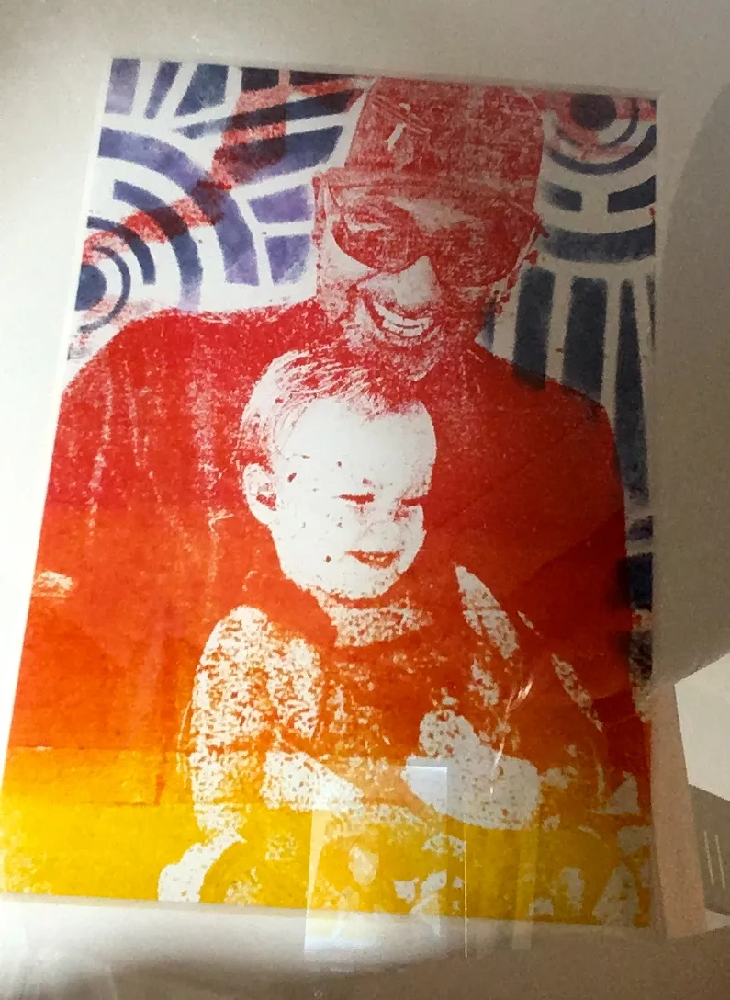
3. Gel Printing and Image Transfer by Giovanna Zara
1. Mini Cards & ATC's by Marsha Valk
2. Artistic photo prints by Jo Lawson
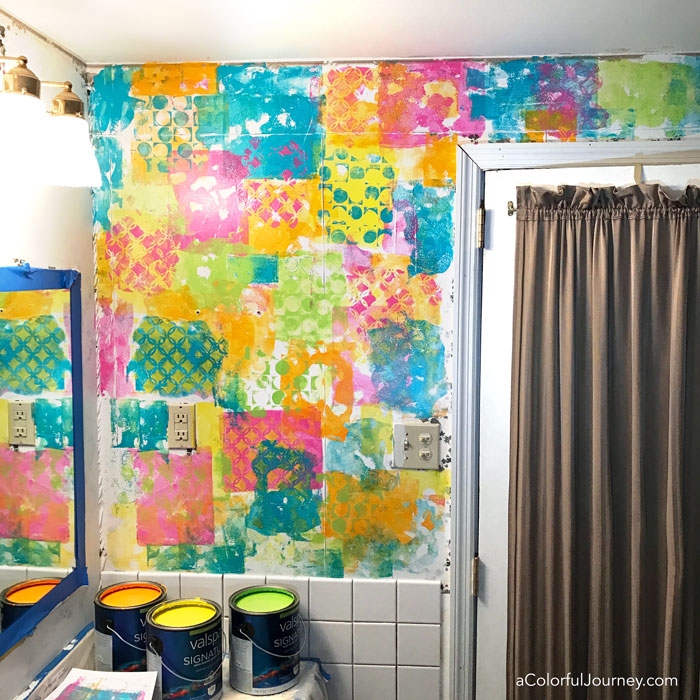
3. Wall decoration by Carolyn Dube
I introduced you to the basics of monoprinting and shared some ideas, and now it's time to put your creativity into practice!
Don't be afraid to let your imagination run free and create something truly unique. With gel printing, the world of art and creativity is in your hands!
See you next week!
Artistic kisses!


