


Since many of the calls we receive at the studio are about questions related to resin, I thought I’d put together a basic guide for you and share some simple project ideas to get started!
Let’s go!
Liquid glass is the common term used for epoxy resin, a two-part system (resin plus hardener/catalyst). Once it cures, it has the appearance and texture of glass, no matter what surface you apply it to.
At SnP, you'll find a variety of resin types from different brands, including Art Resin, UV Resin, and Amazing Cast.
Liquid glass applications are versatile and can be used in two main ways:
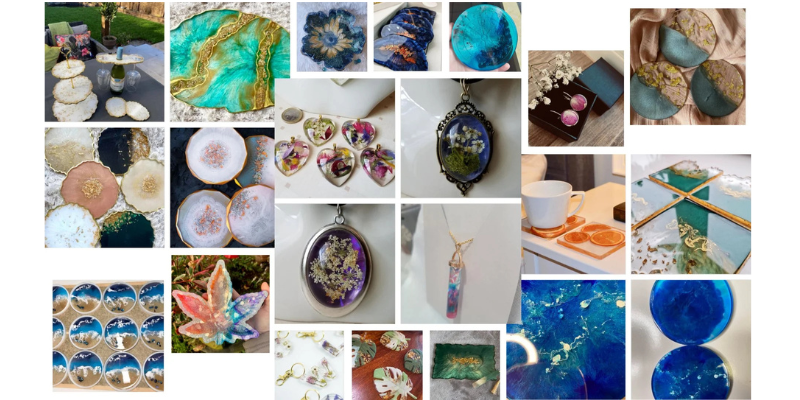
Casting in molds, where you can embed various decorative elements simultaneously. It's important that any material or object you embed—such as flowers, sand, shells, paper, photographs, metal or wooden pieces, glitter, beads, etc.—must be completely dry and free of any moisture or dust.
Coating on objects or surfaces, like tables, metal trays, ceramic bowls, glass, and more. In this case, the resin can also act as a varnish or protective topcoat.
Whatever you decide to create, keep in mind that since it is a chemical product, wearing gloves is essential. Additionally, it’s a good idea to protect your work surface. If your surface gets stained while the resin is still liquid, you can clean it with acetone or alcohol. If it dries and hardens, you will need a solvent and some sanding with sandpaper to remove the residue.
-Copy-3.png)
Of course, you can also add color to the resin! Just a small amount of resin tint is needed, whether in liquid form—like alcohol inks and art resin tints—or in powder or pigment form. Add a few drops of color or an equivalent amount of powder to the prepared mixture and stir well until fully blended.
-Copy-3.png)
-Copy-4.png)
Finally, depending on the size of the object, the curing time varies. On average, the setting time for small to medium simple creations ranges from 1-2 hours up to 48 hours.
Here are some simple ideas to get you started:
-Copy-2.png)
-Copy-2.png)
-Copy-2.png)
-Copy-1.png)
-Copy-1.png)
-Copy-1.png)
So, these are the basics you should keep in mind before starting this extremely creative journey... but we're sure that once you begin and see what's possible, you'll be hooked!
Have a lovely rest of Sunday and a great new week starting tomorrow!
Artistic kisses!


